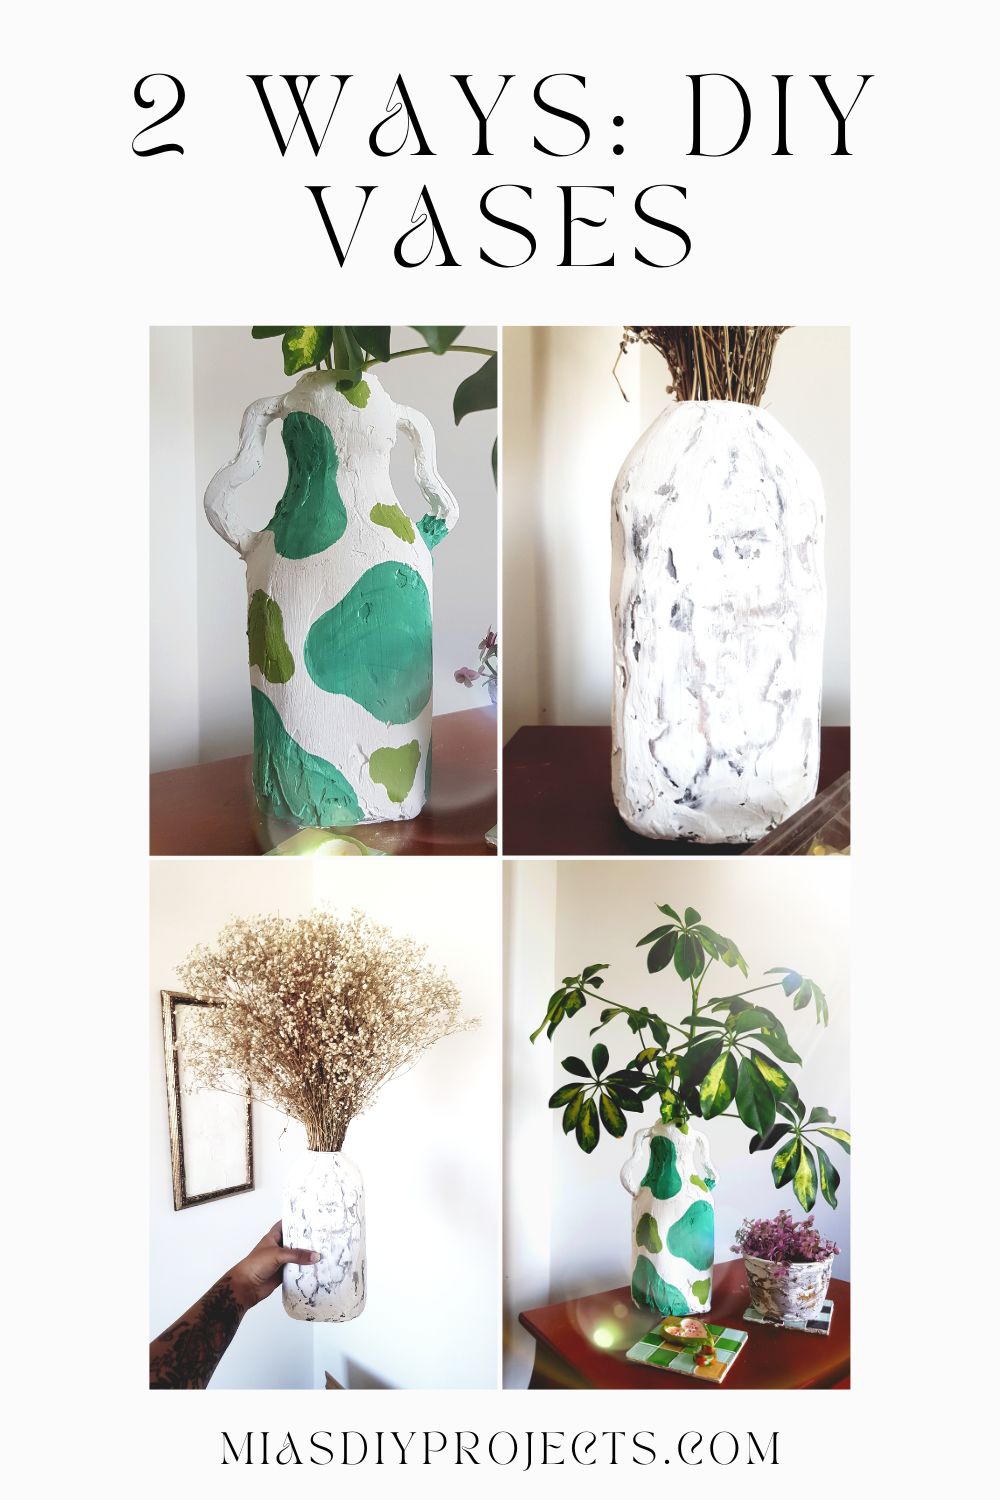
Learn how to create aesthetic ceramic-look vases using old plastic bottles. A great way to repurpose recycle bin finds!

Oh my goodness – how have I not shared this tutorial with you guys yet? Look, I will apologize with my entire chest. I promise, while I may not have been writing, I have been upcycling and crafting my little heart out. Good things are coming, my friends . . .
Well, once I get a working laptop anyway.
For today, though, I want to share one of my recent favourite ways to upcycle old plastic packaging. This method works amazingly with large old bottles – the funkier the shape, the better.
Plus – for fellow plant lovers – these vases are watertight as we keep the plastic bottle base intact. So you can use this trick to make super cute propagation stations!
(And if the words “propagation station” got your motor running, check out my post here for tons of fun DIY propagation station ideas.)
Admittedly, the sage cow print was . . . a choice. It was actually rather cute at first, but I definitely overdid it. Still – I’m pretty obsessed.
Anyhoo – this post is a 2-for-one special so we’re going to take a look at two fun methods for upcycling bottles into vases. Let’s go!
Method 1 – DIY A Funky Cow Print Vase From A Plastic Bottle

Our first idea is honestly my favourite – and it’s a great way to introduce trendy colours and prints into your home without having to invest in them. Plus, if you ever want to change the pattern, simply spray paint your vase white and start again!
What You Need:
- Plastic bottles
- Plaster/joint compound
- Plastic spreader
- Air dry clay (if you want arms)
- Hot glue gun (also if you want arms)
- Paint or a clear matte sealant to finish
- Sanding paper

How To Make:
As always, I have a handy TikTok tutorial for you to check out below!
- Use your plastic spreader to build thin layers of joint compound around your plastic bottle. If you want to smooth out any dips in the plastic (some bottles have odd indents for grip), you can fill them with plaster to create a smooth outline.
- Leave your base coat (and any filling) to fully harden, then add another. Tip: go slow and smooth with plaster here. While you can sand at the end, I find it looks way more cohesive when you build thin and even layers.
- Once you’re happy with the thickness and texture of the plaster, roll semi-thin snakes of air-dry clay out. Shape these into arms and, once hardened, hot glue them to your vase.
- To conceal the joins and keep the texture cohesive, add plaster around the arms.
- Sand down your vase.
- Paint with your desired finish and seal with a sealant of your choice. (I personally like Modge Podge!)
I’m honestly still so impressed with how this one turned out! A collection of them in a glass cabinet would be adorable – especially if you used the idea of having propagations in them.
Enjoying this post? Here are some other upcycles to try!


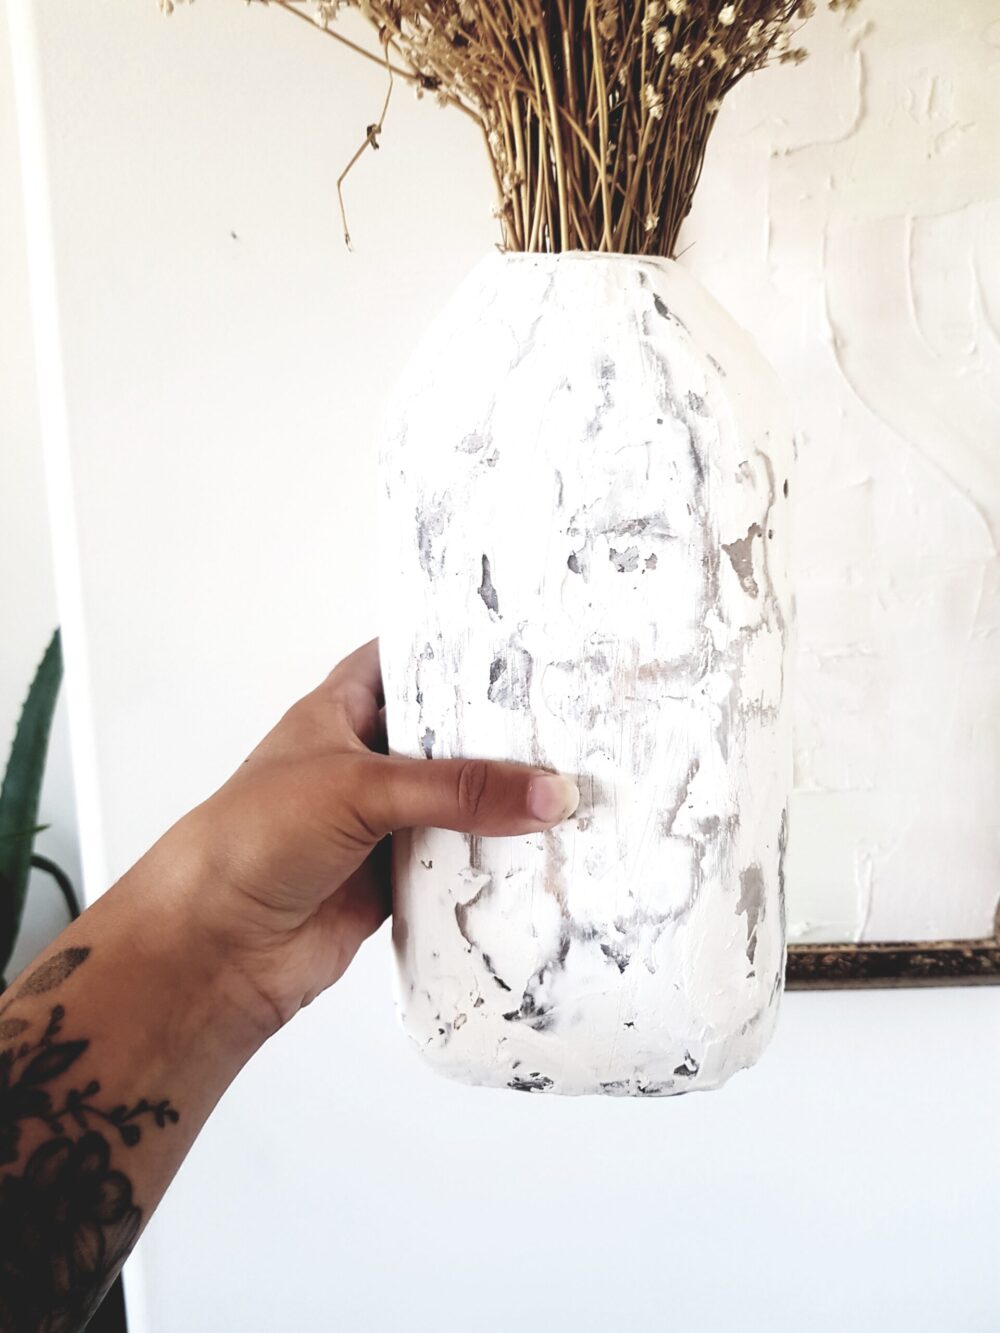
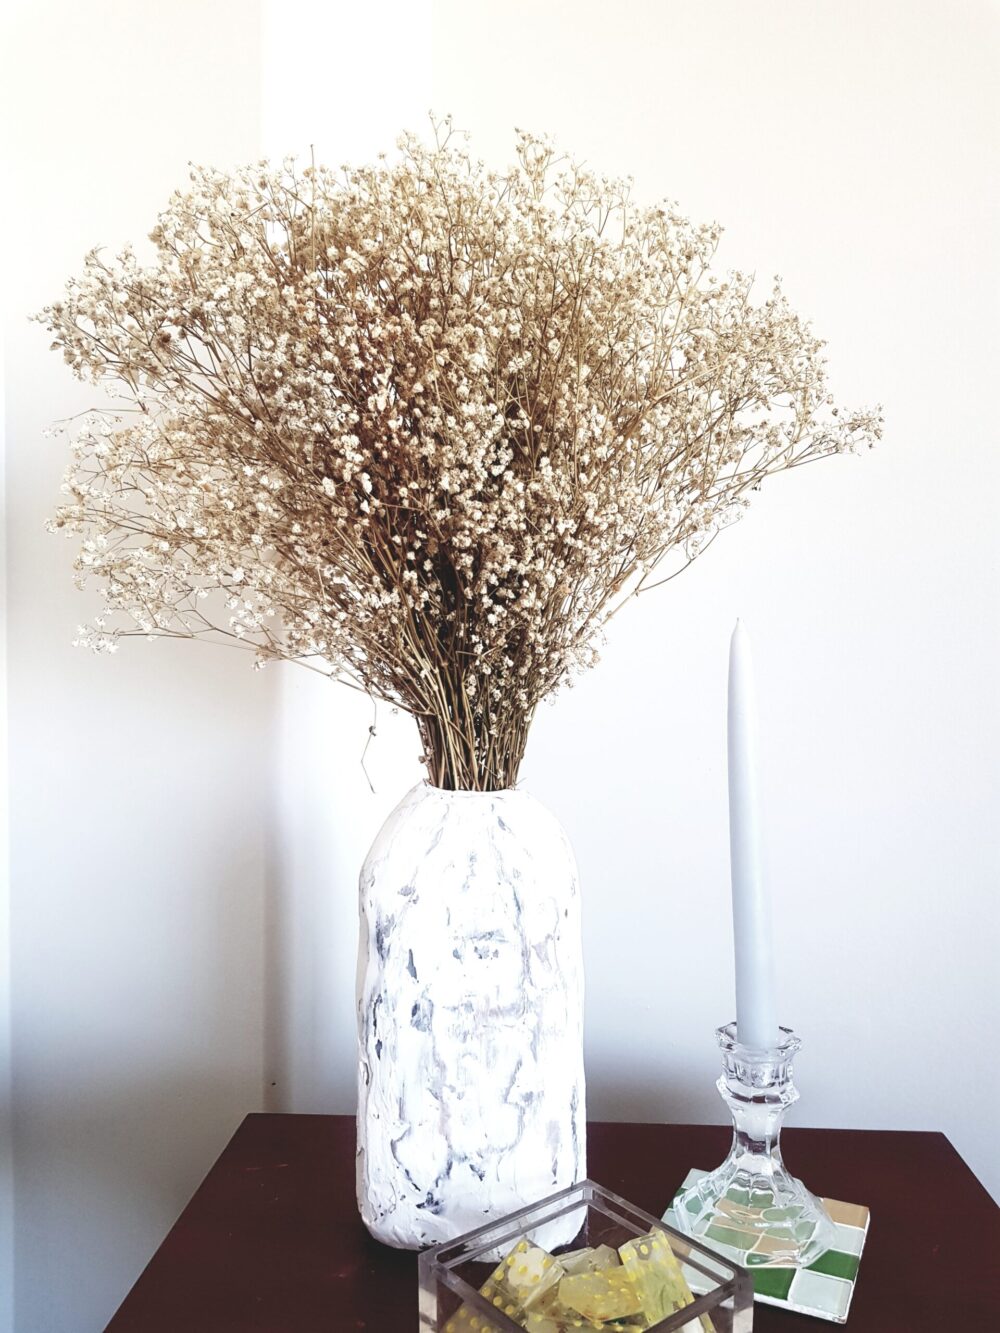
Method 2 – Try This Technique For A Weathered Finish

The second idea I’m sharing today is way more neutral – but no less cute. While this vase could be used for propagations as well, I think the brown undertones look fabulous paired with dried flowers.
What you need:
- Plastic bottle
- Plaster/Joint Compound
- Acrylic paint in brown, white, and black (or another colour palette of your choice)
- Mod Podge
- Sanding paper
How To Make:
For our visual learners, here’s the TikTok tutorial:
Those of you who prefer to read, read on!
- Use a xacto knife to remove the spout of your plastic bottle
- Cover your bottle with joint compound until you’re happy with the shape and leave to dry
- Paint the bottle completely with earthy tones. I used a sponge to add a nice depth to the colours
- Add another very thin layer of joint compound over the bottle
- Use sanding paper to reveal parts of the coloured underlayer until you’re happy with the finished look
- Cover in mod podge to seal
And that’s it!
I hope you guys enjoyed these upcycles as much as I did. Alas, knowing how easy these were to make now means I’m going to hoard recycling . . . but then I’ll share more fun tutorials with you all. So maybe it’s a win-win?
Not to mention the fact most recycling doesn’t actually get recycled, so finding practical ways to repurpose your trash isn’t a bad idea . . .
Which of these two ideas was your favourite? Would you try them out at home? Let me know your thoughts down below – and don’t forget to share this post if you found it helpful.
Fantastic! This is something I am going to do with my niece, and I think my Mam would enjoy iy too! x
Beautylymin
Thank you for reading, Siobhán! x
I always enjoy reading your posts Mia, I aspire to be as creative! I adore the cow patch design too, love these ideas to upcycle plastic x
Thank you so much, Caroline 🙂 I’m a big fan of upcycles at the moment so glad you liked this one too! x